By Jennifer R. Benson
When artist, blacksmith and woodworker Bradford McDougall is not creating his art or producing smithy pieces for other artists, he expands his blacksmithing skills and their applications. Three years ago he became interested in knife making. As many of us would do, he researched on the internet, watched YouTube videos and read articles on the subject. Having the requisite tools in his blacksmith shop, he followed the instructions and found them inadequate, because they left out important steps. He began to teach himself, and over three years, has perfected the process of making a Japanese knife. Now he wants to share his knowledge and is offering knife-making classes.
McDougall invited me to experience the class, so on a recent Saturday, my husband, Brad Benson, and I went to his blacksmith shop on Lost Acres Road. McDougall’s warm personality, ready smile and quick wit welcomed us. McDougall lit the gas-fired forge and things warmed up quickly on that cold January day. The two Brads got right to work. They donned safety glasses and inserted a steel rod into the forge. When the rod was red-hot it was removed and hammered on an anvil to taper the end. The rod cooled quickly and had to be repeatedly reinserted into the forge and hammered until the taper was just right. The tapered end is critical to the rod taking a knife shape when it is later flattened. It is important not to leave the rod in the forge for too long as the iron content in the blade will be compromised, leaving you with a brittle blade.
McDougall introduced the power hammer (and passed out ear protectors) and the rod was flattened and gradually shaped into a blade. Over 30 times the rod went into the forge. The steel became successively thinner with much hammering. Next McDougall showed how to straighten the spine with a hammer on the anvil. Using the cut-off wheel, the men cut off the blade leaving a tang to which a handle could later be attached.
Once more the blade went into the forge, was brought to an even orange color and then was tested to see that it was no longer magnetic. It is at a certain temperature that the steel ceases to be magnetic and all the grains within it are aligned, which makes the next step, grinding, that much easier. The blade was inserted into a mixture of wood ash and vermiculite and left to cool slowly, annealing the blade, making it stronger.
The grinding process consists of holding the blade against an electric-powered, sandpaper-covered belt. The blade was repeatedly dunked in water to cool it; then the blade was held back up against the wheel while sparks flew. This is the step that evens out the blade’s spine and the one that requires a strong spine in the knife maker, standing in one position for a couple of hours.
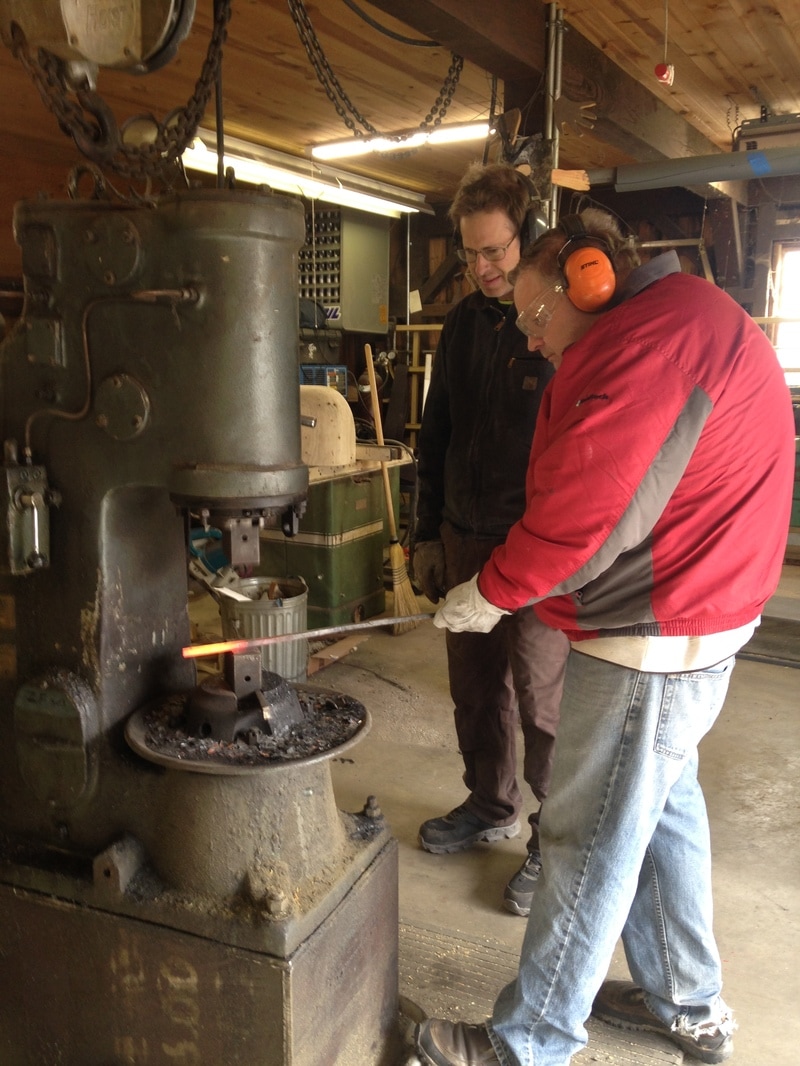
Brad McDougall (left) observes as Brad Benson inserts red-hot steel rod in power hammer. Photo by Jennifer Benson
Using an acetylene torch, the blade was heated using a color chart as a guide. When the blade turns straw-colored at the cutting edge and purple (achieved at a higher temperature) at the spine, it is tempered. The goal is to produce a cutting edge that is hard and a spine that is springy. This step is missing on YouTube videos and is the most important part, according to McDougall. This step can be repeated until you get it right, but get it right you must, or the knife will be prone to break.
A Japanese water stone, which looks like a smooth brick, was used to sharpen the knife. The blade was laid flat on one side against the wet stone and, using repetitive circular strokes, it was sharpened. This was repeated on the other side.
Finally, slow-curing epoxy was poured into a wooden handle fashioned by McDougall and the tang was inserted. The student leaves with his/her knife, but the knife must be immobilized for 24 hours while the epoxy cures. After that, you may slice to your heart’s content, enjoying the satisfaction of utilizing a superior implement fashioned with your own hands with considerable skill and effort.
McDougall’s knife-making class costs $500 per person or $800 for two people. This may seem expensive but consider that the class takes from six to eight hours, you have McDougall’s undivided attention and expertise at your disposal, you will be using a forge, a power hammer, a grinding wheel, an acetylene torch and more. Many of these tools are not found in the average home workshop, plus, you will take home a high-quality Japanese culinary knife, the likes of which could cost several hundred dollars. The next nearest knife-making class, in Rhinebeck, New York, costs $1,200 for five days. Another, in Waltham, Massachusetts, involves eight meetings for $760. McDougall’s class starts to look like a real bargain in cost, time and travel.
A natural teacher, McDougall is calm, engaging, funny, knowledgeable, observant and patient. His class is open to women and men and a knife-making class makes a great gift. To arrange for your class or if you have questions, please call Bradford McDougall at 860-558-8598. To learn more about his artistry, visit bradfordmcdougall.com. The blacksmith shop is located at 108 Lost Acres Road between Lost Acres Vineyard and Lost Acres Orchard.